Harry Potter and the Chamber of Secrets
by OldGamesCracking
Game Specs
| Name | Harry Potter and the Chamber of Secrets |
|---|---|
| Release-Date | 11/2002 |
| Redump ID | 66498 |
| Protection | SafeDisc v2.80.010 |
| Cracked under | Win XP |
| Tested under | Win XP & Win 10 |
| Scene-Crack by | DEVIANCE / CLASS |
Needed Tools:
- Good Old PC (Windows XP)
- x32dbg
- Ghidra
- The original Game-CD of course ;)
- Compiler, Dev-IDE and stuff (e.g. VisualStudio)
- The previous articles on SafeDisc
- Koffeinhaltige Kaltgetränke
Disclaimer
- The games are cracked for educational purpose and to regain compatibility with modern systems
- The games are more than 20 years old and can be found freely on the net via e.g. archive.org
- No parts of the game are distributed
How to Crack
I cracked this game mainly as a benchmark for the solutions I came up with in the last article and realized one thing: for upcoming games I need to restructure my approach since it’s getting messy as SafeDisc now adds more and more fake stuff that makes it increasingly harder to reconstruct the game properly, but that’s a problem for future-me ;)
Nanomites: Update
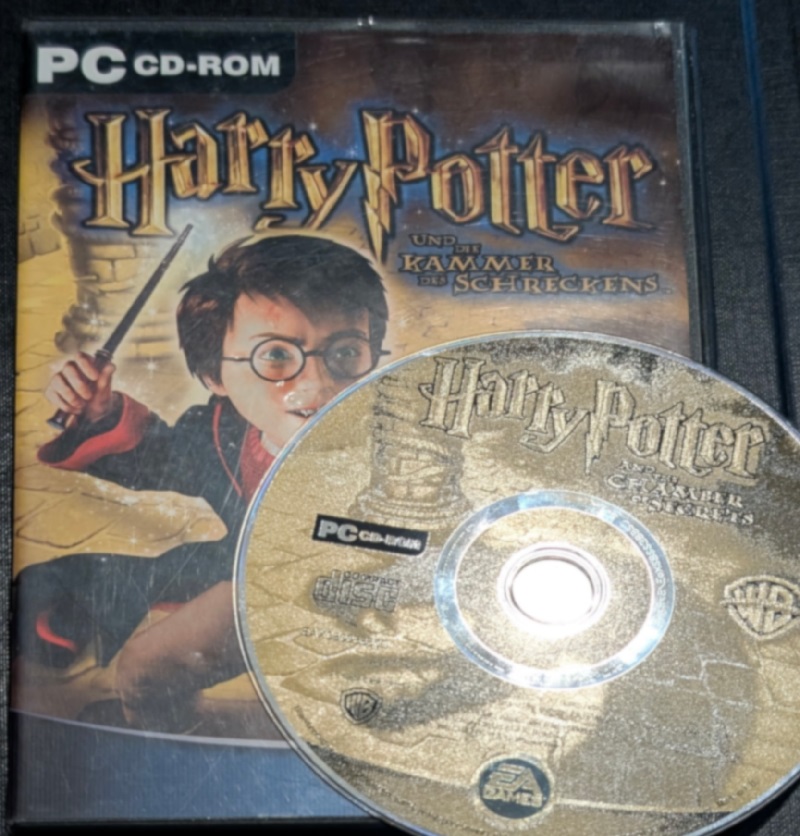
Anyways, remember how we found and decrypted the Nanomites last time? My guess was that there is a game-dependent key (gameSecret) and two other keys/salts that would not change… well, it’s actually the other way around :D The ‘gameSecret’ is still the same (0x000000F7), but the - as I called it - SALT_BASE and SALT_XOR have changed. I found them quite easily by searching for the byte pattern. As you can see, the function is the same, only the values have changed:
Old:
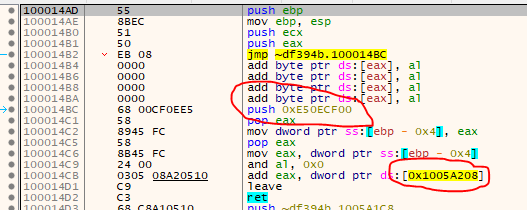
New:
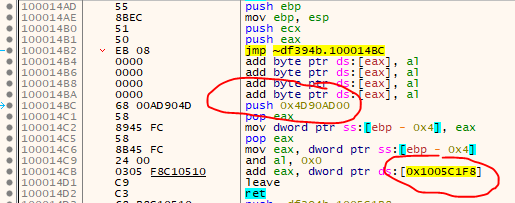
The code around the SALT_XOR has also not changed, but different registers were chosen by the compiler so I had to search a bit:
Old:
New:
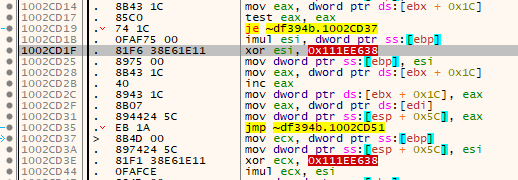
The location and number of the raw Nanomites was easy to find via a pattern:
Old:
New:
So as we can see, the underlaying code of the Nanomites has not changed, only updated keys and addresses. So we should be able to just update some defines and we are good to go. Well, if it was as easy as that…
It took me quite some while to realize that some of the Nanomites were actually fake and were deliberately added to fool us. Some of them beeing very sneaky as the effects are rather subtle and only cause problems later down the line. For example, have a look at the following situation:
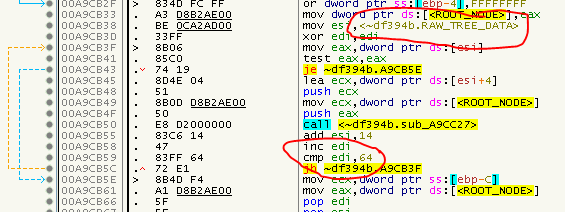
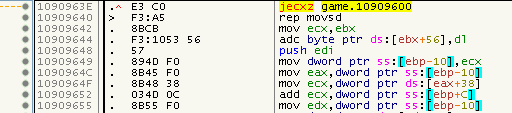
A Nanomite was found at address 0x1090956C and if we look there in the debugger, it also looks like that it is a valid Nanomite (although we can’t see no execution path to that location):

But look what happens if we fix it:

Looks somewhat ok, right? Well, look again and watch the RET above. See how the number of popped stack values changed from 0x4 to 0x104 ? If there are enough values on the stack it will not crash right away but maybe many instructions later when e.g. a pointer on the stack would used. I found out that Nanomites with a restore-offset of != 0 were mainly causing this problem so I excluded them. Also checking if there is an execution path to the restored bytes (exluding the first byte) proved to be helpful. Sadly, I can only check for non-trivial execution paths like Jumps or Calls at the moment, and I do the test based upon a byte pattern, not via parsing the instructions. That being said, I needed to introduce a whitelist since there is at least one valid Nanomite at 0x1090AA62 with that criteria. Feel the sphaghetti code already? Yep, me too ;)
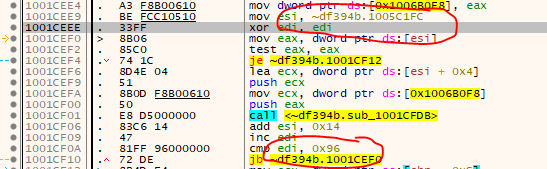
So for example, have a look at the Nanomite at 0x1090610E:
If we would fix it, the following five bytes would also get replaced (it’s a 2-byte Nanomite that has a payload of 7 bytes, offset is 0):
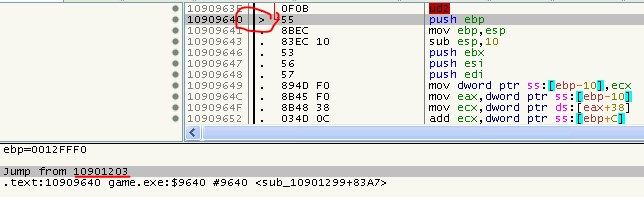
So this looks like a fake-Nanomite. To solve the situation, as I said, I checked for paths to the 5 overlapping bytes. Luckily there is a JMP at 0x10909640, which - according to my theaory - means that it’s a fake Nanomite. Although I could imagine a situation in which the payload of the Nanomite contains the original data and thus would not corrupt the code, but for now, this does not seem to be the case.
So, as always, have a look at FixNanomites in the code of the latest dll_worker linked at the end of the article.
Virtualized Jumps: A (not so) deep dive
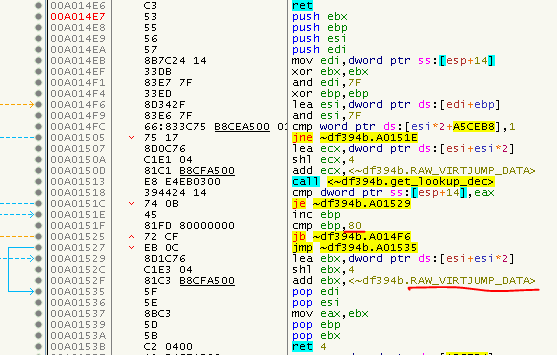
Remember relayed Calls from the previous articles? They now got a little (big) brother: Virtualized Jumps. But before I try to explain them, let’s simply see them in action. So for example at 0x10902527 we will find a CALL to the SafeDisc section.

This CALLs to a setup-stub, then a lookup-stub and then the classic-stub:


So far nothing special. Let’s perform the old trick to get out of this mess (HW BR on stack-top after PUSHFD/PUSHAD). Ok, we land in this mess, looks like the stack is manually re-sorted somehow:
But let’s ignore that for a moment and hit F9 until we land back on a POPFD and step out. You should be here now:
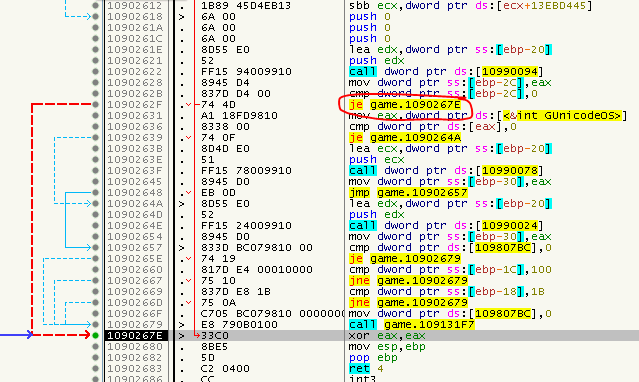
Well, if you have a look at the address, you might realize that we landed at the end of the function we were in just moments ago. Also there are some jumps to that address which indicates that - even under normal conditions - there are valid paths to that address, but without the strange intermediate SafeDisc stuff. So what does that mean? Is this just a JMP in disguise and we can patch the CALL to a JMP? Well, not so fast young padawan. Have a closer look at the instruction before the CALL: A CMP. So looks like we rather need to patch-in a conditional Jump, probably a JE or a JNE. But, look around, do you see this:

Just before the end of the function, we find another CALL to that mysterious SafeDisc stub which lacks a setup instruction to set the ZeroFlag, so this will probably virtualize an ordinary JMP. But how can we tell them apart?
At this moment I was lacking a good (simple) way to figure out the type of the Jump and it’s destination. So there really was only one way: Start up Ghidra and reverse that thing! This time it actually didn’t took too long since I recognized some patterns from the previous article and the time I reversed the Nanomites. So after just a couple of hours, this is what I figured out:
- Based on the return address on the stack, a lookup-hash is generated.
- This lookup is then searched in a list of ‘Nodes’
- If a matching Node is found, it is decrypted. The node contains various fields, the most important of them being the Jump-Type and offset.
- The jump is then virtually performed by altering the return address on the stack
If you are interested in reversing that for yourself, have a look at the ‘CJumpRun::PerformFixup’ function that is actually exported by name. Hint: You should remember how the classic CONTEXT struct of the WinAPI looks like, it will be (mis)used at many places and it helped reversing quite a lot!
But for now, we just need to know the general structure of a ‘Node’:
typedef struct virt_jump
{
	DWORD unknown0;
	struct virt_jump *next;
	SIZE_T op_size_enc;
	DWORD lookup_enc;
	DWORD unknown1;
	DWORD unknown2;
	DWORD unknown3;
	HANDLE hProcess;
	DWORD op_type_enc;
	DWORD offset_enc;
	DWORD op_use_count_enc;
	DWORD unknown4;
} VIRT_JUMP_t;
Don’t count me in on every member, all we really need is lookup_enc, op_size_enc, op_type_enc and offset_enc. The “_enc” means that the values are encrypted since each member has it’s own decryption key which is a simple DWORD with which the value is XORed to get the decrypted value. The keys are as follows:
DWORD key_lookup = 0xff069f5f;
DWORD key_opSize = 0x98caaeb9;
DWORD key_opType = 0x9877d4a7;
DWORD key_opOffset = 0x1138a107;
The lookup is calculated in the following fashion:
DWORD get_lookup_key(DWORD rva)
{
	MD5Context md5;

	md5Init(&md5);
	md5Update(&md5, (BYTE*)&rva, sizeof(DWORD));
	md5Finalize(&md5);

	return *(DWORD*)&md5.digest[0];
}
So pretty much just the first DWORD of the MD5-hash of the RVA of the return address. The size includes the opcode itself and the offset. It is usually 5 (e.g. JMP) or 6 (e.g. JE). The type can be directly transformed into the opcode via the following code:
DWORD type = decrypt(op_type_enc, key_opType);
buffer[0] = (BYTE)(type >> 16);
buffer[1] = (BYTE)(type >> 8);
buffer[2] = (BYTE)(type >> 0);
The very same code is used for 5 and 6 byte types, so the last or the last 2 bytes of the type are usually overwritten by the operand (the offset).
So, the last question that remains now is: Where is the underlaying array that holds all the nodes? Have a look at this routine:
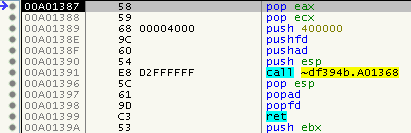
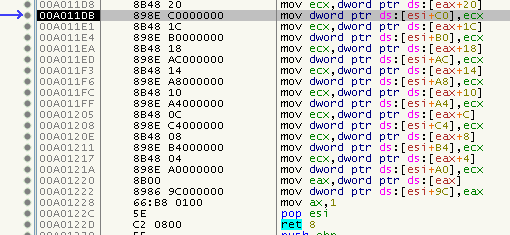
There you have it, 0x80 nodes, starting at 0xA5CFB8. Reconstructing them is quite easy. Just go through the text section, search for relative Calls (E8) and see if we have a corresponding lookup. For more details, have a look at FixVirtualizedJumps.
I guess these were the major changes, there might have been more smaller improvements but I don’t remember all of them :)
The game does not seem to have additional CD-Checks and I have played it for a few minutes without any problems, so I guess I have found and removed most of the SafeDisc stuff ;)
Latest version of the dll_worker:
To inject it, use the Simple Injector I created for Stronghold Deluxe and the Game DLL from Stronghold Crusaders.
tags: Harry Potter - Harry Potter and the Chamber of Secrets - Game Cracking - Reverse Engineering - SafeDisc - Nanomites - DLL Injection